How To Install Wooden Blinds
With our step-by-step guide you'll have your new wooden blinds up in no time
Installing your wooden blind should be a straightforward process. Before you begin, make sure you have all the tools listed below and that your blind is undamaged and with pelmet and all brackets included. You will need to provide your own screws as they are not supplied with our wooden blinds. Choose 4mm diameter screws, suitable for the material you are installing into. If you need any assistance, give us a call or start a live chat and our trained customer support team can help.
You Should Have:


Inside Recess Fitting Video - Wooden Blinds
Outside Recess Fitting Video - Wooden Blinds
Step by Step Fitting Instructions
-
Step 1
If you’re fitting the blind outside the window recess ensure that measurement C in the diagram below is the same to ensure the blind fits symmetrically.
If you’re fitting the blind inside the recess you can top fix the brackets to the lintel or face fix the brackets to the window frame.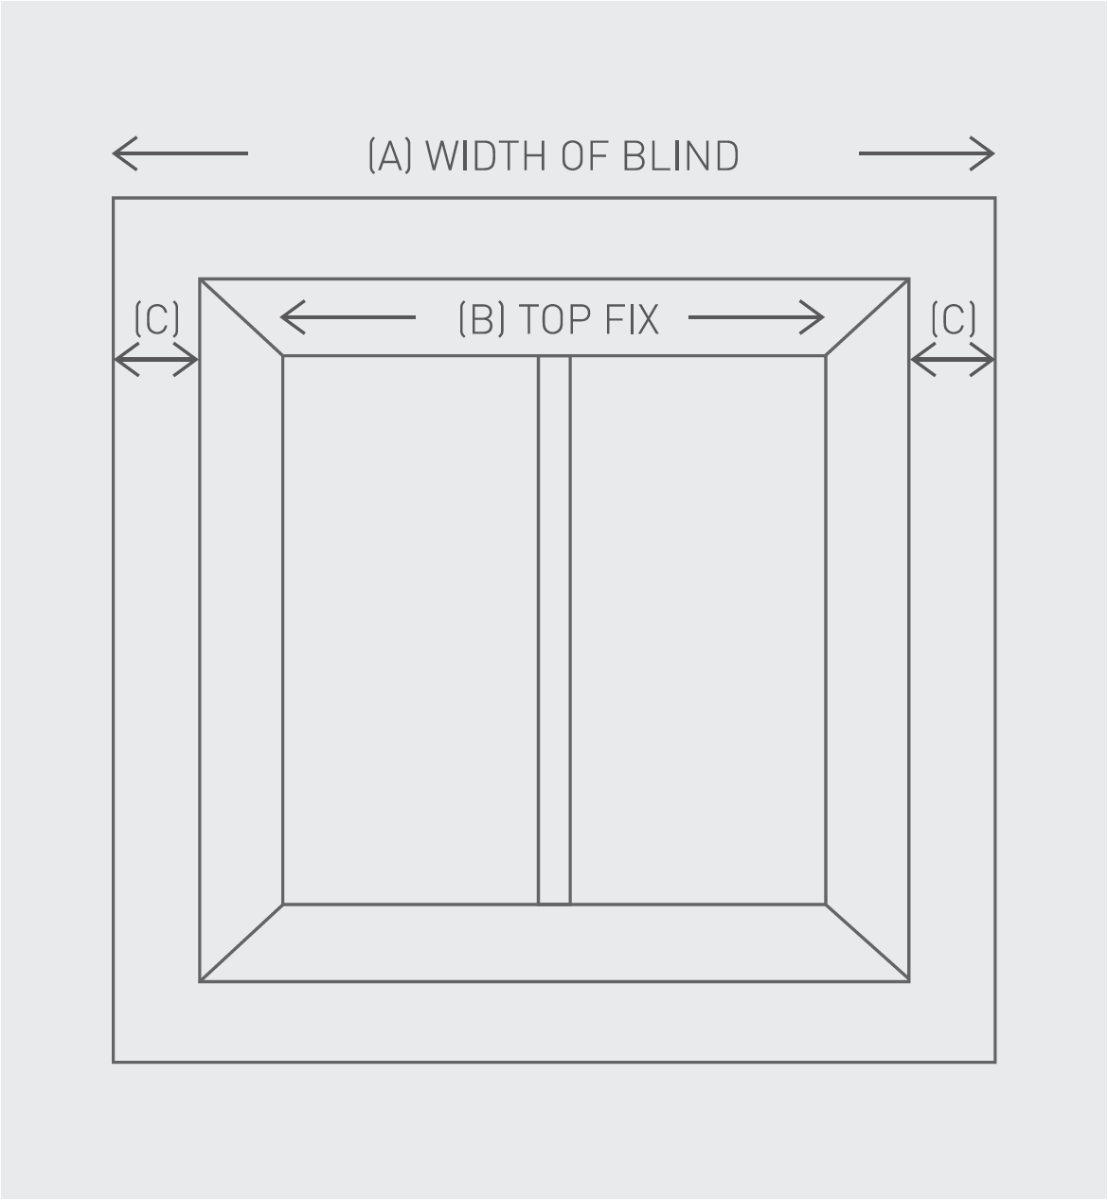
-
Step 2
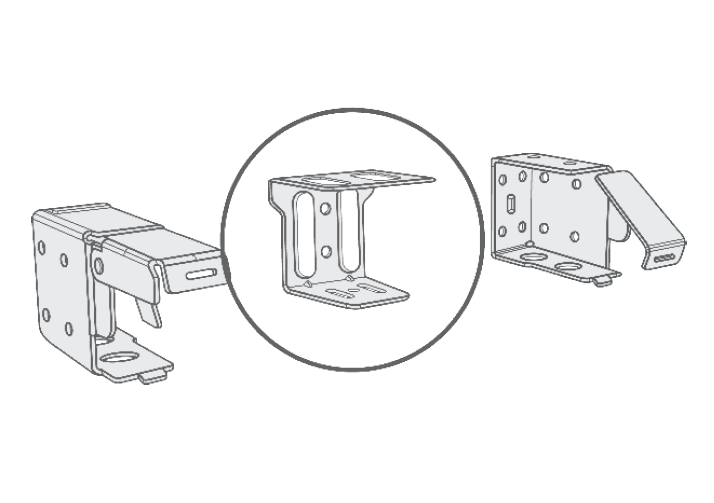
The brackets can be used to face fix, side fix or top fix. For recess fitting you will use side or top fixing, while for outside the recess fitting you will use face fixing. Next, measure and mark the distance between the wall and the back of the bracket, allowing for obstructions like handles that protrude into the recess area. The brackets should be positioned 6mm wider than the blind at each end. Hold each bracket in place and mark the hole positions on the wall with a pencil. Affix each bracket in place using 4mm diameter screws. Ensure the fixings you choose are suitable for the surface to which you are mounting the brackets.

-
Step 3
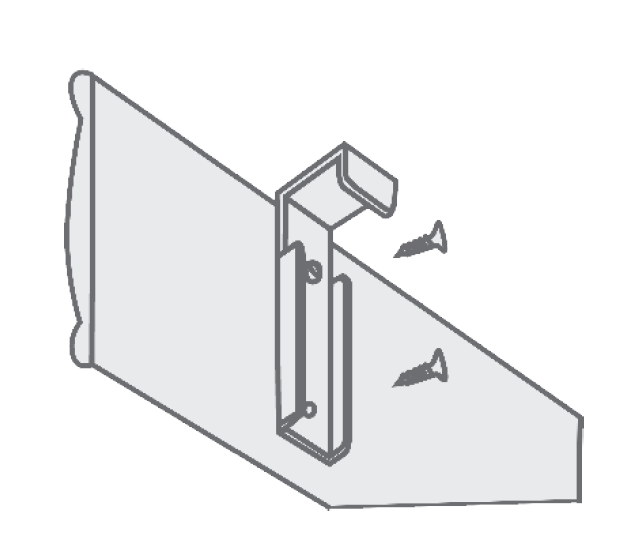
For wider blinds a central support bracket is required. Align the top of the central bracket with the top of the mounting bracket before installation. Install with the bigger flap ('gate') of the central bracket on the top, equally spaced along the width of the headrail. Make sure the central bracket is fitted clear of central cords or tapes that run down the slats.
-
Step 4
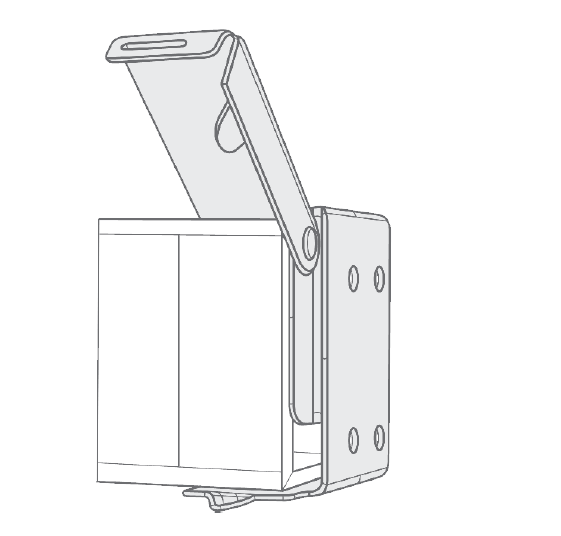
Open the gate of the box brackets, slide the headrail into position and snap the brackets closed.
-
Step 5 - Optional
Hold down clips are optional.
Using two small screws, screw the hold down clip to the window facing or the wall/window recess. Pop the bracket pin ends into the hole at bottom rail end.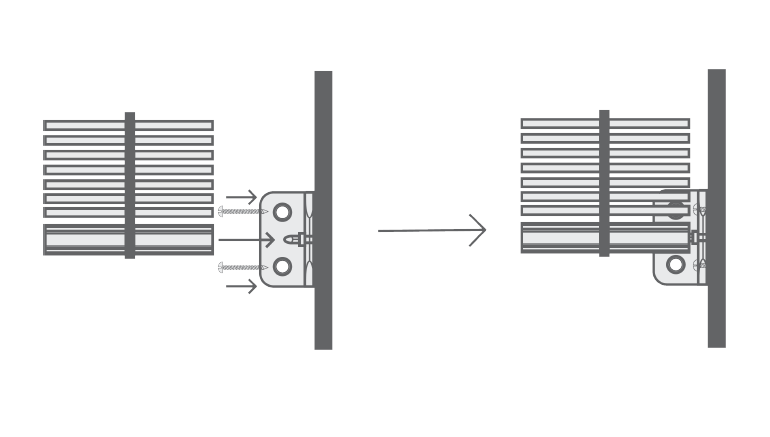
-
Step 6 - Optional
Screw the valance clips onto the back and level with the top of the valance using the screws provided. Alternatively you may have Velcro tabs to stick the valance onto the headrail - this is an easier way of installing the pelmet onto the headrail.
-
Step 7 - Optional
Hook valance clip with attached valance onto the top of the headrail.
-
Step 8 - Optional
Depending on the exact blind ordered, you may have received valance returns. If your blind has been supplied with valance returns, screw one end of the valance return clip onto the valance using screws provided.
Align the edge of the valance return with the valance then screw the other end of the valance clip onto the valance return. -
Step 9
You must install the safety cleat as close to the headrail of the blind as possible and in all cases not less than 1500mm from the floor.
Place the safety cleat in the desired position on the wall and mark the positions of the holes with a pencil. Drill holes as required.
-
Step 10
Screw the safety cleat to the wall in the pre-drilled holes.
-
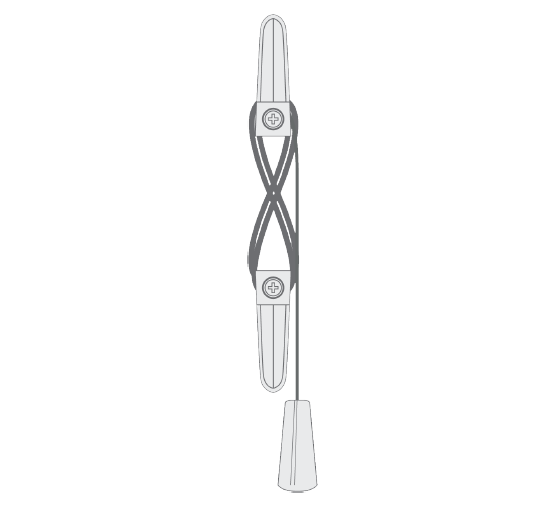
Step 11
Wrap the cords around the cord cleats in a figure of 8. When the cords are fully accumulated ensure they are secure, so when the cord is pulled no excess is released.
-
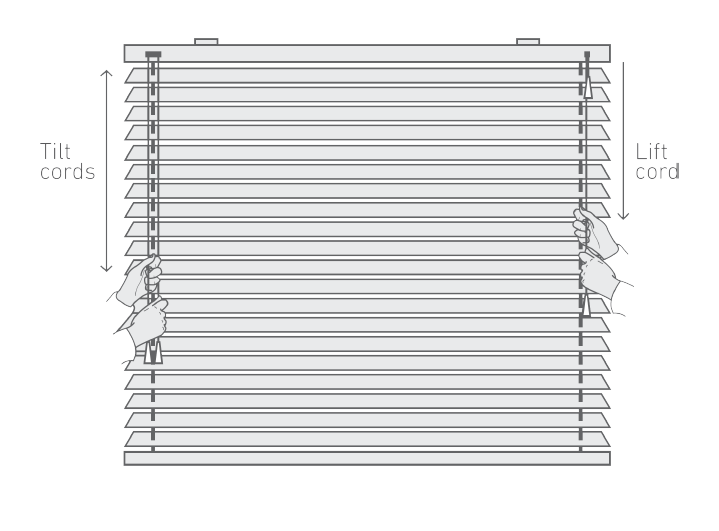
Operation
To tilt the blind, pull on tilt cord tassel to angle slats to the open or closed position. To increase blind life, tilt the blind to the horizontal position when lifting or lowering the blinds.
To lower, move lift cord towards the middle of the blind, and pull down gently until the cord lock releases. To raise, pull the lift cord downward until the blind reaches your desired height.
To lock, pull lift cord towards the outside of the blind and release. The cord will automatically lock.