Setting Up your new electric roller blind
Setting up an electric roller blind takes as little as 15 minutes, just have your blind installed and remote handy.
Already fitted your electric blind?
If you have already installed your electric blind in your window then it’s time to set it up. If you’ve not installed it yet, then please follow our installation guide for electric roller blinds.
Let’s check the battery is fully charged.
| Motor LED Colour | Behaviour |
|---|---|
| Solid Red LED | Charging |
| Green LED blinks twice every 10 secs | Charging is near completion |
| Solid Green LED | Charging is complete |
Time to wake up the motor!
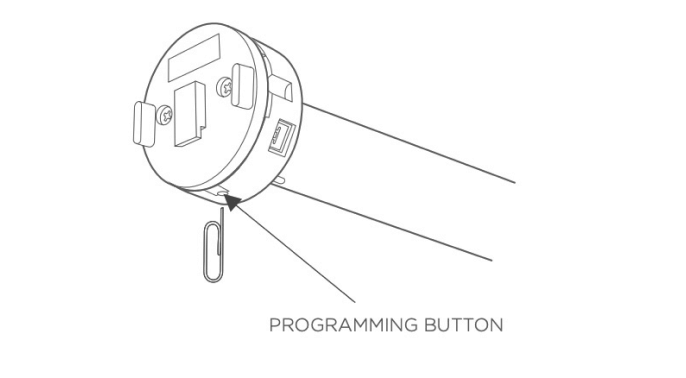
In order to protect your blind during transit, the motor has been placed in sleep mode, prior to installation please wake the motor up by following the following instruction;
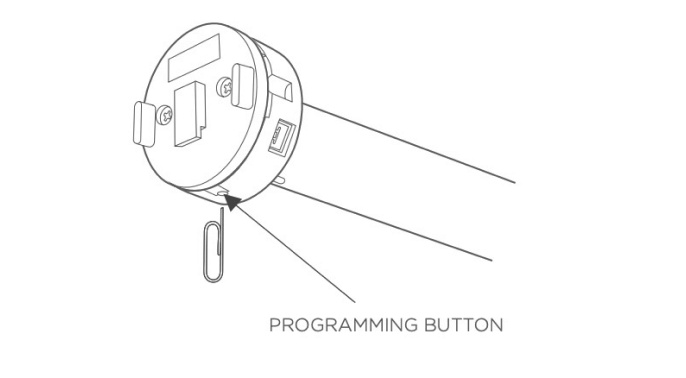
- Press the programming button on the motor head for 1 second until the blind jog once, the jog confirms the blind is now awake.
- If the blind does not wake place on charge.
How to charge the battery
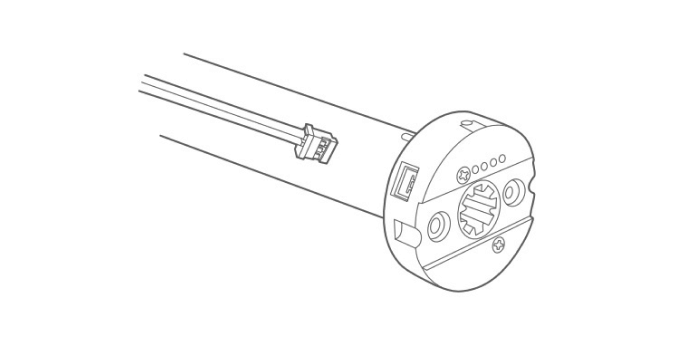
- Charge the battery by connecting the charger to the motor. (The blind will jog once)
- While charging the motor will blink green twice every 10 sec, and the charger light will be red.
- Charging will take up to 5 hours.
- When charged, the motor will display a solid green LED and the charger light will be green.
- Follow the colour code on Table 1
Operating the Blind
The blind will not arrive paired to any remote you have purchased, but there will be pre-set upper and lower limits on the blind(s). You can operate the blind once you have paired it with the remote.
Take a look to the 4 Channel RTS remote diagram and get familiarised


How to operate the blind

1
To change channel press the CHANNEL SELECTOR to select the desired channel. (Channel indicator will briefly be lit).

2
Briefly press the UP button to move to the upper limit.

3
Briefly press the DOWN button to move to the lower limit.

4
Briefly press the STOP button to move to the intermediate limit (favourite position).
Adjustments to Pre-Programmed Motor
If the motor does not respond to the remote, the motor will need to be reconnected.
To do this make
sure the motor is awake, hold the programme button on the motor head for 2 jogs, next press the programming
button on the back of the remote.
The remote should now be connected and you can proceed to
programming the motor.
Pairing the first remote

1
Using the CHANNEL SELECTOR, select the desired channel (channel indicator will briefly be lit).

2
Upon waking the motor, with a pen or paperclip press PROGRAM button on the remote until the blind jogs.
Pairing the second remote

1
Using a paperclip or pen, press and hold the PROGRAM button on the original remote for 1 second until the blind jogs once.

2
Using a paperclip or pen, press the PROGRAM button on the new remote for 3 seconds until the
blind jogs once.
New remote is now added to the memory and can be used to operate the
blind.
Adding a channel

1
Select the desired channel you wish to duplicate by momentarily pressing the CHANNEL SELECTOR button on the multichannel remote.

2
Using a paperclip or pen, press and hold the PROGRAM button on the remote until the blind jogs once.

3
Select the new channel and press the PROGRAM button on the remote until the blind jogs once. Additional (new) channel is now added to the motor memory and can be used to operate the blind.
Deleting a channel

1
Using a paperclip or pen, press and hold the PROGRAM button on the remote until the blind jogs once.

2
On the remote select the desired channel to be deleted.

3
Press the PROGRAM button on the remote until the blind jogs once. Channel is now deleted from the motor memory and will not operate the blind.
Adjusting the motor rotation direction

1
Press the UP or DOWN on the remote to move the blind away from the end limits.

2
Press and hold the UP and DOWN buttons simultaneously until the blind jogs.

3
Press the and hold STOP button until the blind jogs, the rotation direction is now reversed.

4
Press the UP button to check the new rotation direction.
Adjusting upper limit

1
Briefly press the UP button. Blind will move to pre-set upper limit.

2
Press and hold the UP and DOWN button until the blind jogs.

3
Press and hold the UP or DOWN button to move the blind to the new upper position.

4
To confirm the new position press and hold the STOP until the blind jogs. The new upper limit is now added to the memory.
Adjusting lower limit

1
Briefly press the DOWN button. Blind will move to pre-set upper limit.

2
Press and hold the UP and DOWN button until the blind jogs.

3
Press and hold the UP or DOWN button to move the blind to the new lower position.

4
To confirm the new position press and hold the STOP until the blind jogs. The new lower limit is now added to the memory.
Setting intermediate limit (Favourite position)

1
Move the blind to the desired intermediate limit using the UP or DOWN buttons

2
Briefly press the STOP button to stop at the desired position.

3
Press and hold the STOP button until the blind jogs, the intermediate limit is now memorised, and the green LED light will flash 5 times.
Speed adjustment mode

1
Press the UP or DOWN button on the remote to move the blind away from the end limits.

2
Press and hold the UP, STOP and DOWN buttons simultaneously until the blind jogs once.

3
The blind will jog in 10 second cycles until it enters into speed adjustment mode.
Increasing the motor speed

1
Press and hold the UP button until the blind jogs, repeat as needed. The maximum setting has been reached when the blind briefly moves 3 times in one direction and three times in the opposite direction.
Decreasing the motor speed

1
Press and hold the DOWN button until the blind jogs, repeat as needed. The minimum setting has been reached when the blind briefly moves 3 times in one direction and three times in the opposite direction.
Confirming new speed settings

1
Press and hold the STOP button until the blind briefly jogs.
Restore to factory settings
1
To delete all previous settings: Using a paperclip, press and hold the PROGRAM button, located on the top of the motor casing, until the blind jogs 3 times (approx. 12 seconds).
*All remotes and limits will be erased from the motor memory. Motor is now reset to factory mode.
Programming Instructions
Pairing a remote with the motor

1
Once unprogrammed motor has been woke, select the desired channel by pressing CHANNEL SELECTOR on remote (channel indicator will briefly be lit).

2
Press and hold the UP and DOWN buttons on the remote simultaneously until the blind jogs.

3
To check the correct direction of rotation press the DOWN button. If the blind lowers skip step 4 and 5.

4
If the blind rises press and hold STOP button until blind jogs.

5
Press the DOWN button again to test that the motor direction is correct.
Setting upper and lower limit
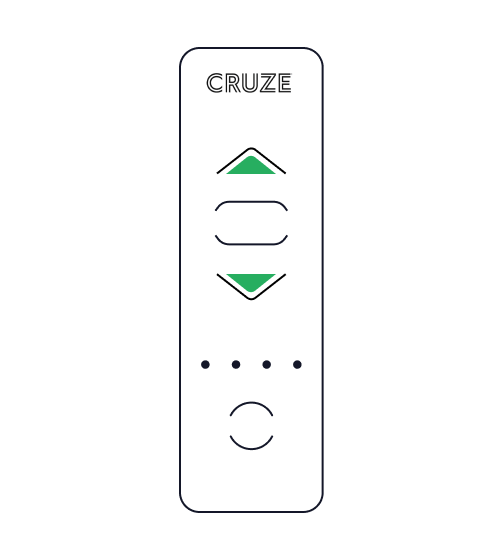
1
Move the blind to the desired upper limit by pressing the UP button. If necessary, adjust the upper limit using both the UP and/or DOWN buttons.
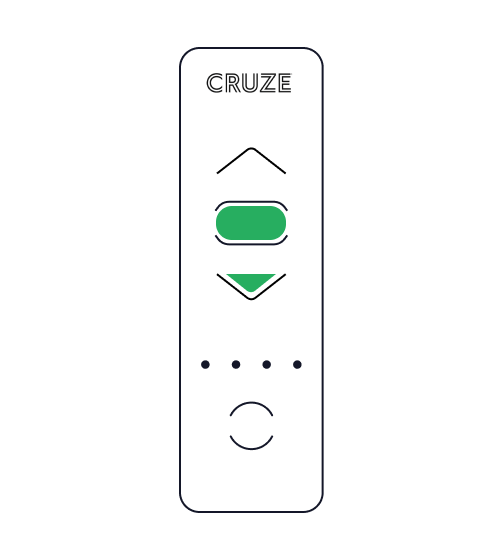
2
Press the STOP and DOWN buttons simultaneously, once the blind begins to move, release the buttons. The upper limit is now memorised and the green LED will flash 5 times. The blind will continue to move down. Press the STOP button to stop the blind at your desired lower limit.
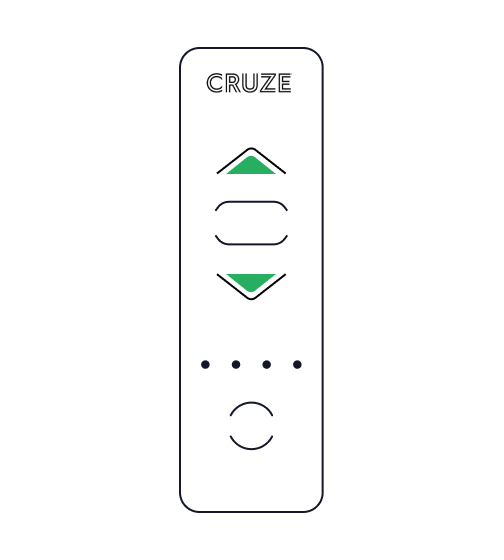
3
If necessary, use the DOWN and/or UP button to move the blind to the desired lower limit.
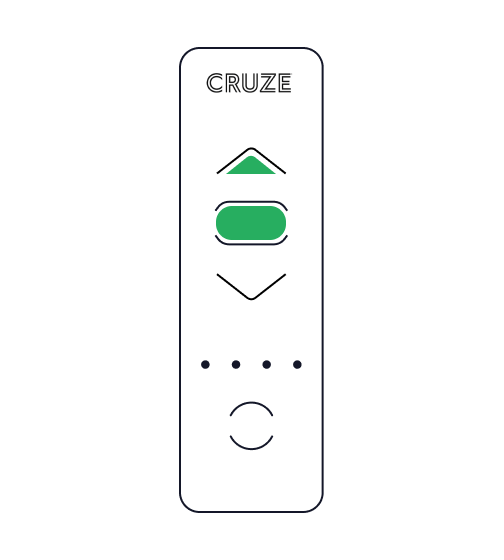
4
Press the STOP and UP buttons simultaneously, once the blind begins to move release the buttons. (The blind will automatically move to the upper limit). The lower limit is now memorised, and the green LED light will flash 5 times. Press and hold the STOP button until the blind jogs to save all the limits.
Recording the remote

1
After pre-setting the end limits, briefly press the programming button on the back of the remote. The motor will jog and the led light will flash green 5 times. The remote is now recorded.
Programming Multiple Blinds
If programming more than one motor on a multi channel remote, ensure all other motors are in sleep mode whilst programming individual motors.
Activating temporary sleep mode
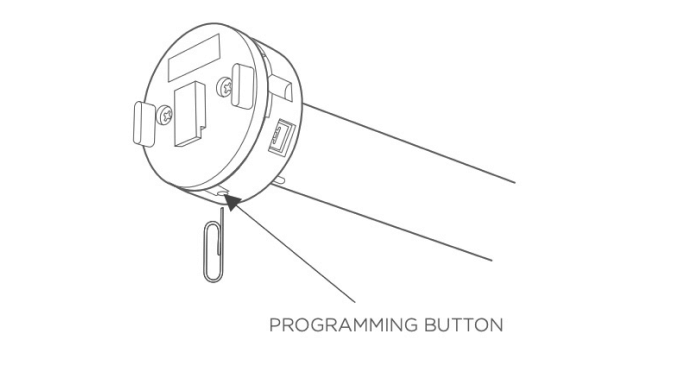
Press and hold the programming button on the motor head and the blind will jog once, next briefly
press the programming button again and the motor will jog twice. The LED will flash orange while
the motor is in temporary sleep mode.
After 15 min Blind will jogs once and will
automatically
wake up.
Activating long sleep mode
Hold the programming button on the motor head, the motor will jog once. On the remote hold the UP, DOWN and STOP buttons simultaneously until the blind jogs once. The green light will blink 5 times.
Deactivating sleep mode
Press and hold the programming button on the motor head for 1 second, the blind will jog once.
Checking the remote is paired with motor

Press the UP or DOWN button on the remote, if the blind moves the remote is paired. If the blind does not move, follow pairing a remote’s instruction.


